O.K. so, we’ve had a lot of requests over the last year or so, for folks to be able to make their own cards – specifically in a manner that lets them create the cards on the site. Consequently, this post is a tutorial on how one might be able to do exactly that.
In essence, what you’ll first need is an account to get into the backend of Phylo’s WordPress theme. This, you can do by contacting me (Dave Ng – db at mail dot ubc dot ca) – I might need some validation of your identity (i.e if you’re a teacher who wants to use it in a classroom, then maybe some way of verifying your teacher status would be great). Basically, because of the way the website is currently set up, we are taking a small security risk when we provide access (if you happen to be a programmer type who knows an easy way to fix this, then do contact me as well!).
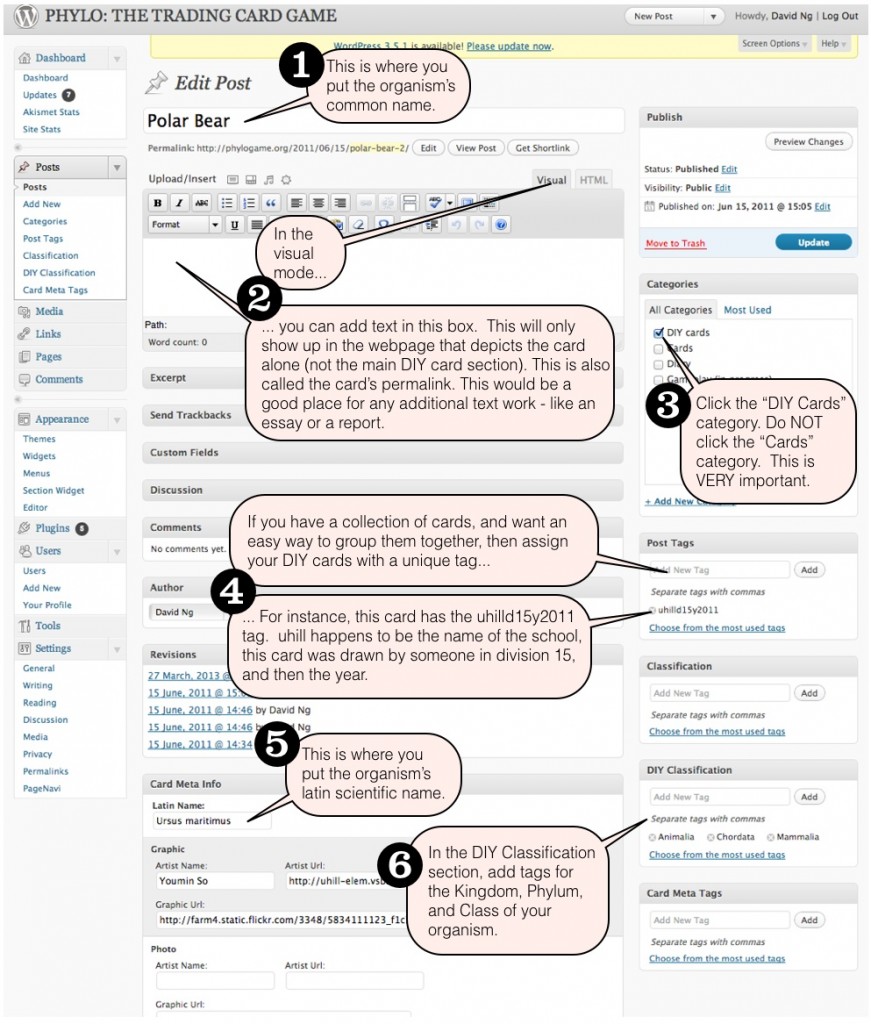
Once inside the administrative back-end of the wordpress template, then making a new card is pretty simple. It’s actually akin to making a “new post.” What’s key, however, is that you populate your DIY cards ONLY in the DIY sections of the website, and not the main areas, which are still presented after being vetted by various editorial processes (i.e. for art, for science, etc). If this one stipulation is something that is repeatedly disregarded, then we would have to revoke access (at least until we can figure out a way where we can cleanly separate the production lines for “Cards” versus “DIY cards.”
Anyway, for this tutorial, let’s start with a sample card – like this Polar Bear one!
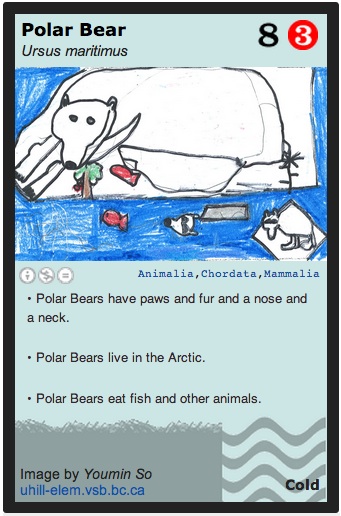
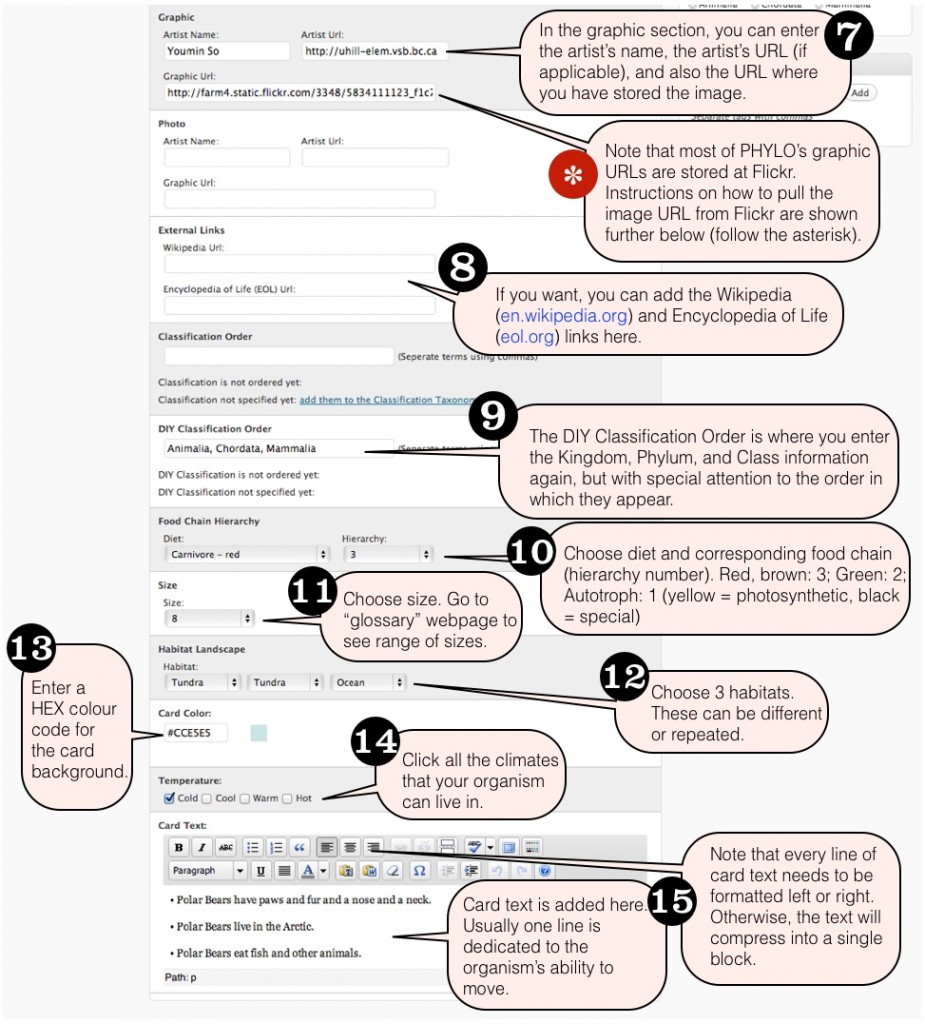
Below are some labeled screen captures, which essentially provide step by step instructions on what to do if you want to make your own DIY card, and/or a DIY deck (this would simply be a collection of DIY cards under a common “post tag.”)
(Note that you can click on these screen capture images to make them bigger).
As you can see, it’s actually fairly straightforward. If you already have your habitat and diet info on hand, it should take less than 5 minutes to piece together the data required for a card.
– – –
As far as where you keep your images, it’s actually up to you. This site tends to aggregate its official imagery and art at Flickr, which has worked really well, but in principle, as long as you have an image URL, anything should work. The main caveat is that the website is designed to pick up images with a certain ratio of width to height – specifically about 2.4 to 1.5, or 360 pixels by 225 pixels (all our phylo images have actually been reformatted to these pixel dimensions, large enough for high res printing, but small enough to be pretty much useless for anything but card imagery – i.e. it protects against digital art theft). This isn’t to say that an image MUST have these ratios – it’s just that if it doesn’t, the image may crop itself, and/or perhaps present itself on the card with a blank spaces at the bottom.
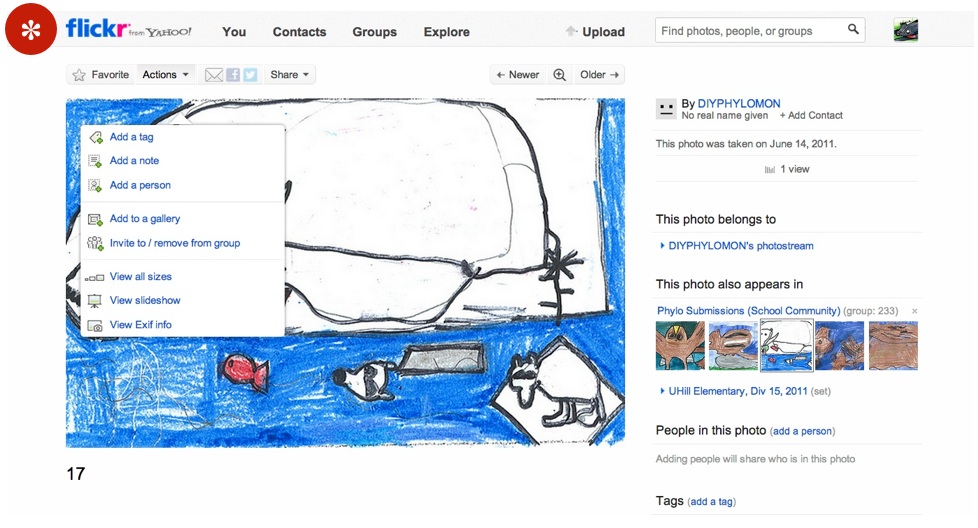
Since, finding the graphic URL in Flickr is not always that intuitive, below are a few screen captures that show you how (although we’ve heard it’s different depending on which browser you use, so do leave a comment, if you have to do it differently). As before, these screen capture images can be clicked on to see a larger version.
Click on the uploaded image, and click the “actions” button. This should present a menu like the one below:
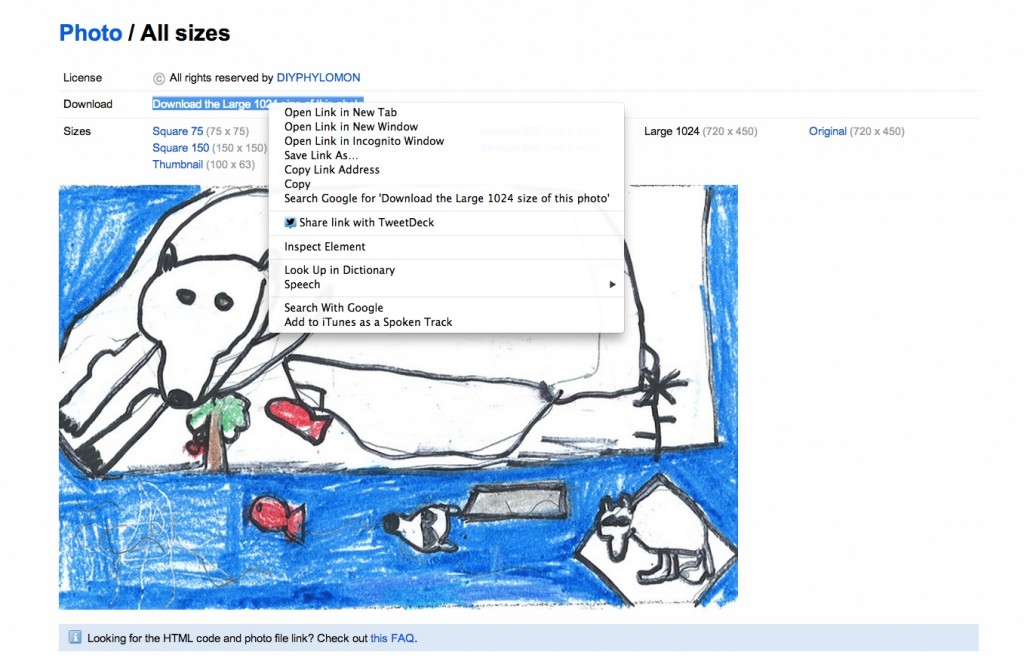
Then click on the “view all sizes” and you’ll get taken to a webpage that lets you look at the image in different sizes:
Now right click on the link that is provided to the right of the “download” label. Here, you’ll get another menu popping up, and you’ll want to click on “copy link address”. With that done, you can go to your DIY card new post and “paste” the URL into the Graphic URL box!
